Pages

Showing posts with label sewing. Show all posts

Friday, 14 October 2016

Shrinking

Well, I confess, this is truly slow fashion.  So many things have conspired to keep me away from my sewing room this week and today is the first time I have had the chance to turn on my overlocker (serger).

Having decided that I certainly need to pre shrink this lovely Japanese cotton fabric I needed to do a little pre-prep before throwing it into the washing machine.  It frays, hence the overlocked edge.


I'm washing it at 40deg c. Although 30deg would be fine for something that does not actually need washing I am thinking of what might happen to the dress in the future.  There is no division of labour in my house, since we no longer have small children at home, washing is done on a need to wear basis (by which of us has run out of socks or underwear).  This means as often as not there is a man doing the washing in our house and although his sorting skills are second to none (no jeans washed with white shirts for him) he washes everything at 40deg and I don't want further shrinkage to occur.

I have readjusted my schedule a little and, having checked my measurements against the pattern hope to be cutting out on Sunday.

I have a physical pattern rather than a download but 'bglad' in the comments on my last post asked if anyone had tried taking the pdf to a print ship and printing off on a continuous sheet.  Well, yes I have,  when I was involved in the Titanic Project this is what I did and it worked very well, though I needed strong pins as the thinest paper in my local shop was still quite thick.  It was also quite a novelty for the guys in the printers, I don't think they had had a similar request before.

xx

C

Tuesday, 10 March 2015

Halfway through and it's Day #21

Isn't it always the way when trying to choose the perfect capsule wardrobe?  Nothing quite matches up. In my case the capsule was of six items and each time I decided on a theme, around a pair of blue jeans, tailored grey trousers or a favourite cardigan, there was always something missing.  Even when I eventually decided on the set of six items the sixth item was a piece of fabric that had been waiting in my stash for nearly two years.  But put together with other stash items it became a skirt in  a day

Approximately 1.5m of boiled wool fabric and  an old waist slip. Zip and sewing thread left overs from a previous project

(Although the zip was the wrong colour it is the invisible type and the tape not destined to show in the finished article, the thread did match, the brighter colour is just a trick of the light)

First I washed the fabric.  It is unlikely that boiled wool would shrink but I wanted to make sure, I used a product called Soak Wash a fabulous no rince hand washing liquid that I not only use for all my hand knits but other hand wash items too.  Soak has been invaluable during the Six Items Challenge for quickly washing out clothes I need for the next day without putting on a full load in the washing machine.

Next I cut out two rectangles measuring my hip measurement plus 5 cm by my required skirt length plus 6 cm and laying it on my cutting table I cut both pieces into 5 using big curving lines

the waistband is at the bottom, the hem at the top of the picture
I then stitched the pieces back together using a twin needle,


I did consider using a contrast colour thread


but decided on keeping to one colour (I found matching silk thread in my leftovers collection)


I joined the pieces by overlapping and stitching with the twin needle, creating waist darts by increasing the overlap at the top of the skirt to 4 cm and tapering to 1 cm over 10 cm at the back and 6 cm at the front.  The measurements are approximate as I made the adjustment on my manequin. 

Once I had completed the overlapped sections I checked the measurements again, trimming the sides to  fit my measurements  and allow for a 1 cm seam.  There is no need to allow for neatening seams as boiled wool is felted sufficiently that it will not fray.  At this stage I cut a shaped waist facing (no waist band) about 15 cm deep freehand to match the shape of the top of the skirt,  before inserting the zip.  I finished by attaching the lining to the waist facing, the facing to the top of the skirt and hand sewing the hem and around the zip.


Ready to wear in a day!  And wearing it today with my grey tee


xx

C

Tuesday, 3 March 2015

Extra clothing allowance

In addition to the six clothing items, as you have already seen I am allowed lots of accessories, essentials like knickers and shoes and one coat.  I am wearing my grey knit dress again today (and my leadlight cardigan as I'm postponing turning on the central heating) but as I have photographed it several times already I thought I would show off my coat instead.


The coat pleases me is several different ways.  Firstly is is made almost entirely from stash materials


From the top, scraps of hand painted silk velvet (from my cousin the fabric artist, Sharon Verry's oddments bag), dark blue lining material from stash, orange silk lining from Cloth House in Berwick Street, (bought specially but with an aged credit note) and wool tweed given to me by a friend who found it in her loft when having a clear out recently.

I thought a about the style for a long time before putting scissors to the fabric.  I especially wanted a stand-up collar with inward facing revers. Eventually I chose the collar and sleeves from this pattern and cut the straight body shape free hand.


This is possibly my most used pattern, I have slashed and stuck the jacket and dress patterns in so many directions I am wondering how much longer it will last.


My coat's first outing was to be to my cousin's youngest son's wedding in December last year, hence my wish to use some of her velvet


The huge ceramic buttons are from a craft shop in Porthleven Cornwall.  I lined the sleeves with the dark blue lining and the body in orange silk


Button holes as well as the moon gazing hare are in velvet.  I sourced the hare outline from Pinterest and freehand cut it into slices to be able to use as many different colours of the velvet as possible.  I ironed on fusible interfacing before cutting the pieces and machine appliquéing  them to the cut out back section of the coat

xx

c


Tuesday, 17 July 2012

On negative ease and learning from the past

It took me a little while to feel as comfortable as this in my new skirt and sweater but I got there in the end


When I made this skirt for the Titanic project the fit was so good that it got me thinking.  I wondered what it would look like made in a contemporary style.  When I say contemporary I mean short, there was no need to mess with the shape in any other way at all.  I made a few little modifications like using a zip fastener under the scallops.


I still did lots of hand stitching as I felt the skirt went together better that way.  It is made entirely with stash fodder, the gunmetal coloured linen was bought a while ago on a visit to Goldhawk Road and the ribbon left over from a previous project, rummaging around in my work-basket I found the right colour cotton and zip.

I loved the skirt it looks perfect in its 21st century guise, I expect to make it again and again and I love the little Tana Lawn shell top, Sorbetto, from Colletterie patterns (it is a free download at the moment)  But not together,


So delving into the stash boxes again I came up with three skeins of Manos Del Uruguay silk and merino blend in just the right colours.  A search on Ravelry came up with the perfect pattern from Ram Wools Yarn Co-op.


The largest size was a 36inch - too small for me so I swatched (yes I truly did) and added stitches to give me an extra 2 inches round.  I also decided to go for an all stocking stitch construction with curly edges.  This is when I discovered what negative ease is.  It was huge and only looked OK if I grabbed a handful at the back and smoothed out some of the curlyness.


It was just a Sloppy Joe and not the look I wanted at all (I should have learnt from the way Sorbetto was the wrong shape).  So I pulled it all out and made it up in the 36inch size, obeyed all the pattern instructions and VOILA!


So, negative ease - knit a sweater that you want to fit snugly about 2inches smaller than your bust size then it will fit not hang.


xx

C

Tuesday, 12 April 2011

Serendipity in Berwick Street

I have yet to find the woolly equivalent of shopping heaven.  Imagine if you will a street where you find the little crafty shops of Bath, your local wool shop and John Lewis wool department all in one side street with a shouty market (which sometimes smells of fish) at one end. This is Berwick Street Soho, not knitting nirvana but the next best thing. The nicest place in London for fabric surprises. 

This is The Cloth House


I often make my best stash finds when I am just browsing, no pressing need to find exactly the right thing, just a gentle stroll to see what is there, a preliminary recky.  On days like this I often return home with all sorts of exciting parcels.  It’s saunter-buy-gloat-stash in that order (make up later).

I really don’t like the expression ‘killing time’.  Time is precious, every second should be savoured and not wasted.  But I did arrive in Regent Street a little early to meet my dear friend a couple of weeks ago so time to slip up Great Marlborough Street and glance in Borovick’s. 


Ignore the animal prints, shiny PVC and day-glo tulle stacked up by the door (unless that is what you seek).  Inside there are treasures, cotton percale shirting, fine striped linen and, deep in the back of the shop, silk in many colours and weaves.  The plain silks (and the PVC) are permanent residents but there are always surprises.  On my last visit, just inside the door I found a jumble of bright silks, roll ends from some designer’s workshop and bought this.


 Not exactly a random purchase this time but certainly a random amount there was only 2.2 m left on the roll.  For a jacket with deep tucks, wide facings and a collar cut on the cross that dipped halfway down my back?  By piecing the collar (the pattern so crazy that the joins on the scraps of fabric disappeared) I had just enough. 


 A whole evening sat at my sewing machine, back to JTH is a bit rude so I don’t usually get a project done in one sitting.  But last Saturday when all the boys were out together I rather forgot the time.  I just sat and sewed, finishing off the hand sewing in the sun on Sunday morning (while the boys sipped alka seltzer)


The boys had been to the stag night, I will wear the jacket at the wedding.  

Friday, 21 January 2011

Book review: Made at Home by Lisa Stickley


The lovely people at Quadrille Publishing sent me Lisa Stickley's gorgeous new book to review.  From first sight it's a delight.  The instructions and cutting layouts are quirkily hand drawn in charcoal and white with occasional splashes of red and yellow. The beautiful colour photographs follow this simple colour palette too, misty, atmospheric shots that make you long to stitch up every project and create the same perfect shabby-chic home.


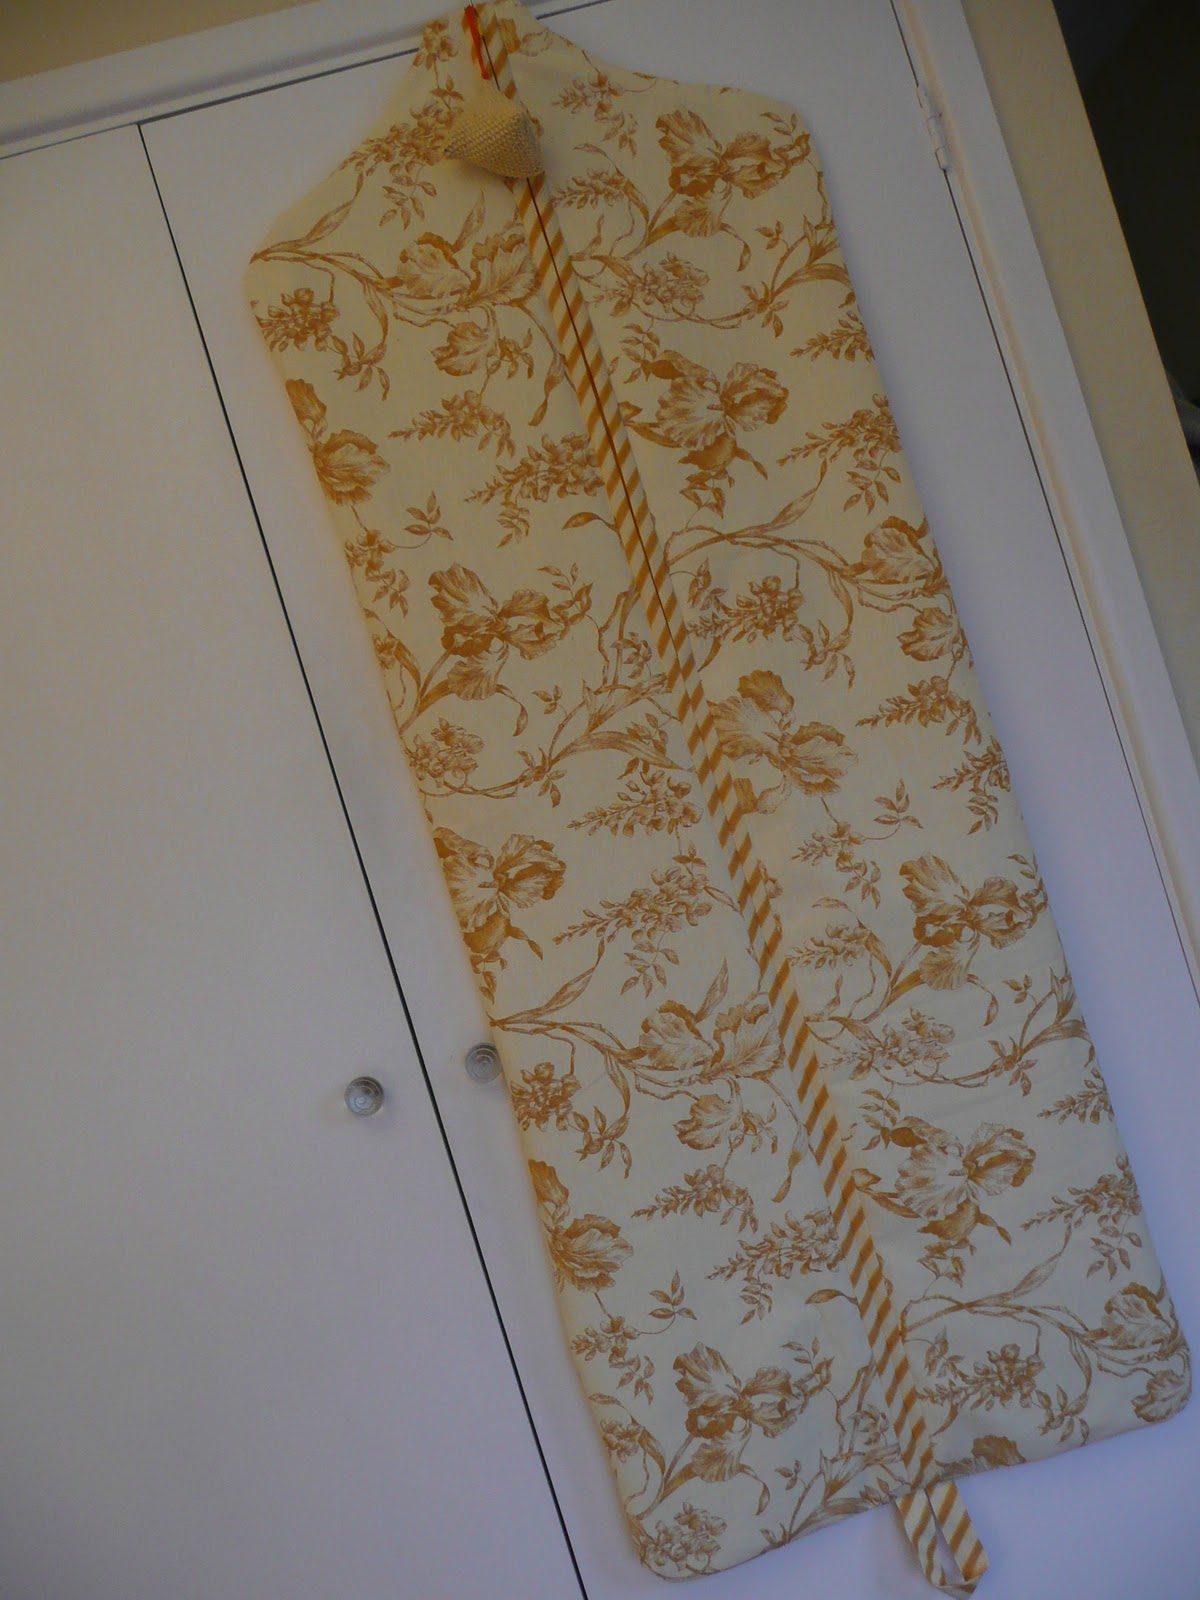
If you own this book the section on basics (equipment and techniques)  is all you will ever need to make some lovely hand made treasures.  I decided the only way to test the book properly was to make up one of the projects.  But which one?  Cushions, place mats, napkins or an apron? Hard to choose, but I decided to be prettily practical and begin with the suit carrier. Delving into my stash I came up with remnants from my kitchen/breakfast room curtains (the fabric might look a bit fancy for a kitchen but I was going through my theatrical period when I made them)!


When I sew I tend to use patterns and project books for the ideas and cutting layouts and then launch off on a frolic of my own when it comes to construction.  When making the suit carrier I decided to follow the directions to the letter, trying to put myself in the position of someone who had never sewn before.  The instructions are very simple, set out clearly and prettily on the page (I like the tiny irons and scissors that dot the page and love the hand drawn-ness of the diagrams). 


If I were being very picky I would say a couple of the instructions are a tiny bit confusing.  For instance in explaining how to apply the binding Lisa says to stitch it 'all the way round the first front half' then 'repeat this on the corresponding straight edge of the second half'  But I think this shouldn't be too much of a bear trap for a beginner, cross checking to the illustration it was clear that the binding is applied to the straight sides only of both halves of the front . 


I have made clothes, all my curtains and the odd cushion but not something like this.  And despite a more or less efficient system of storing out of season clothes in the wardrobe in the spare room, I have always relied on flimsy dry cleaners' bags.  Now I've finished my first Lisa Stickley project I am bowled over by its loveliness, after a rummage in my stash box I have found enough fabric for three more!


Oh and the fabric Lisa uses!  Almost all of it looks like good cotton with the same screen printed design, keeping to the charcoal, yellow and red colour scheme.  I wonder where I can buy some?!