Pages

Thursday 29 November 2018

Time for a new winter coat

Its getting colder...


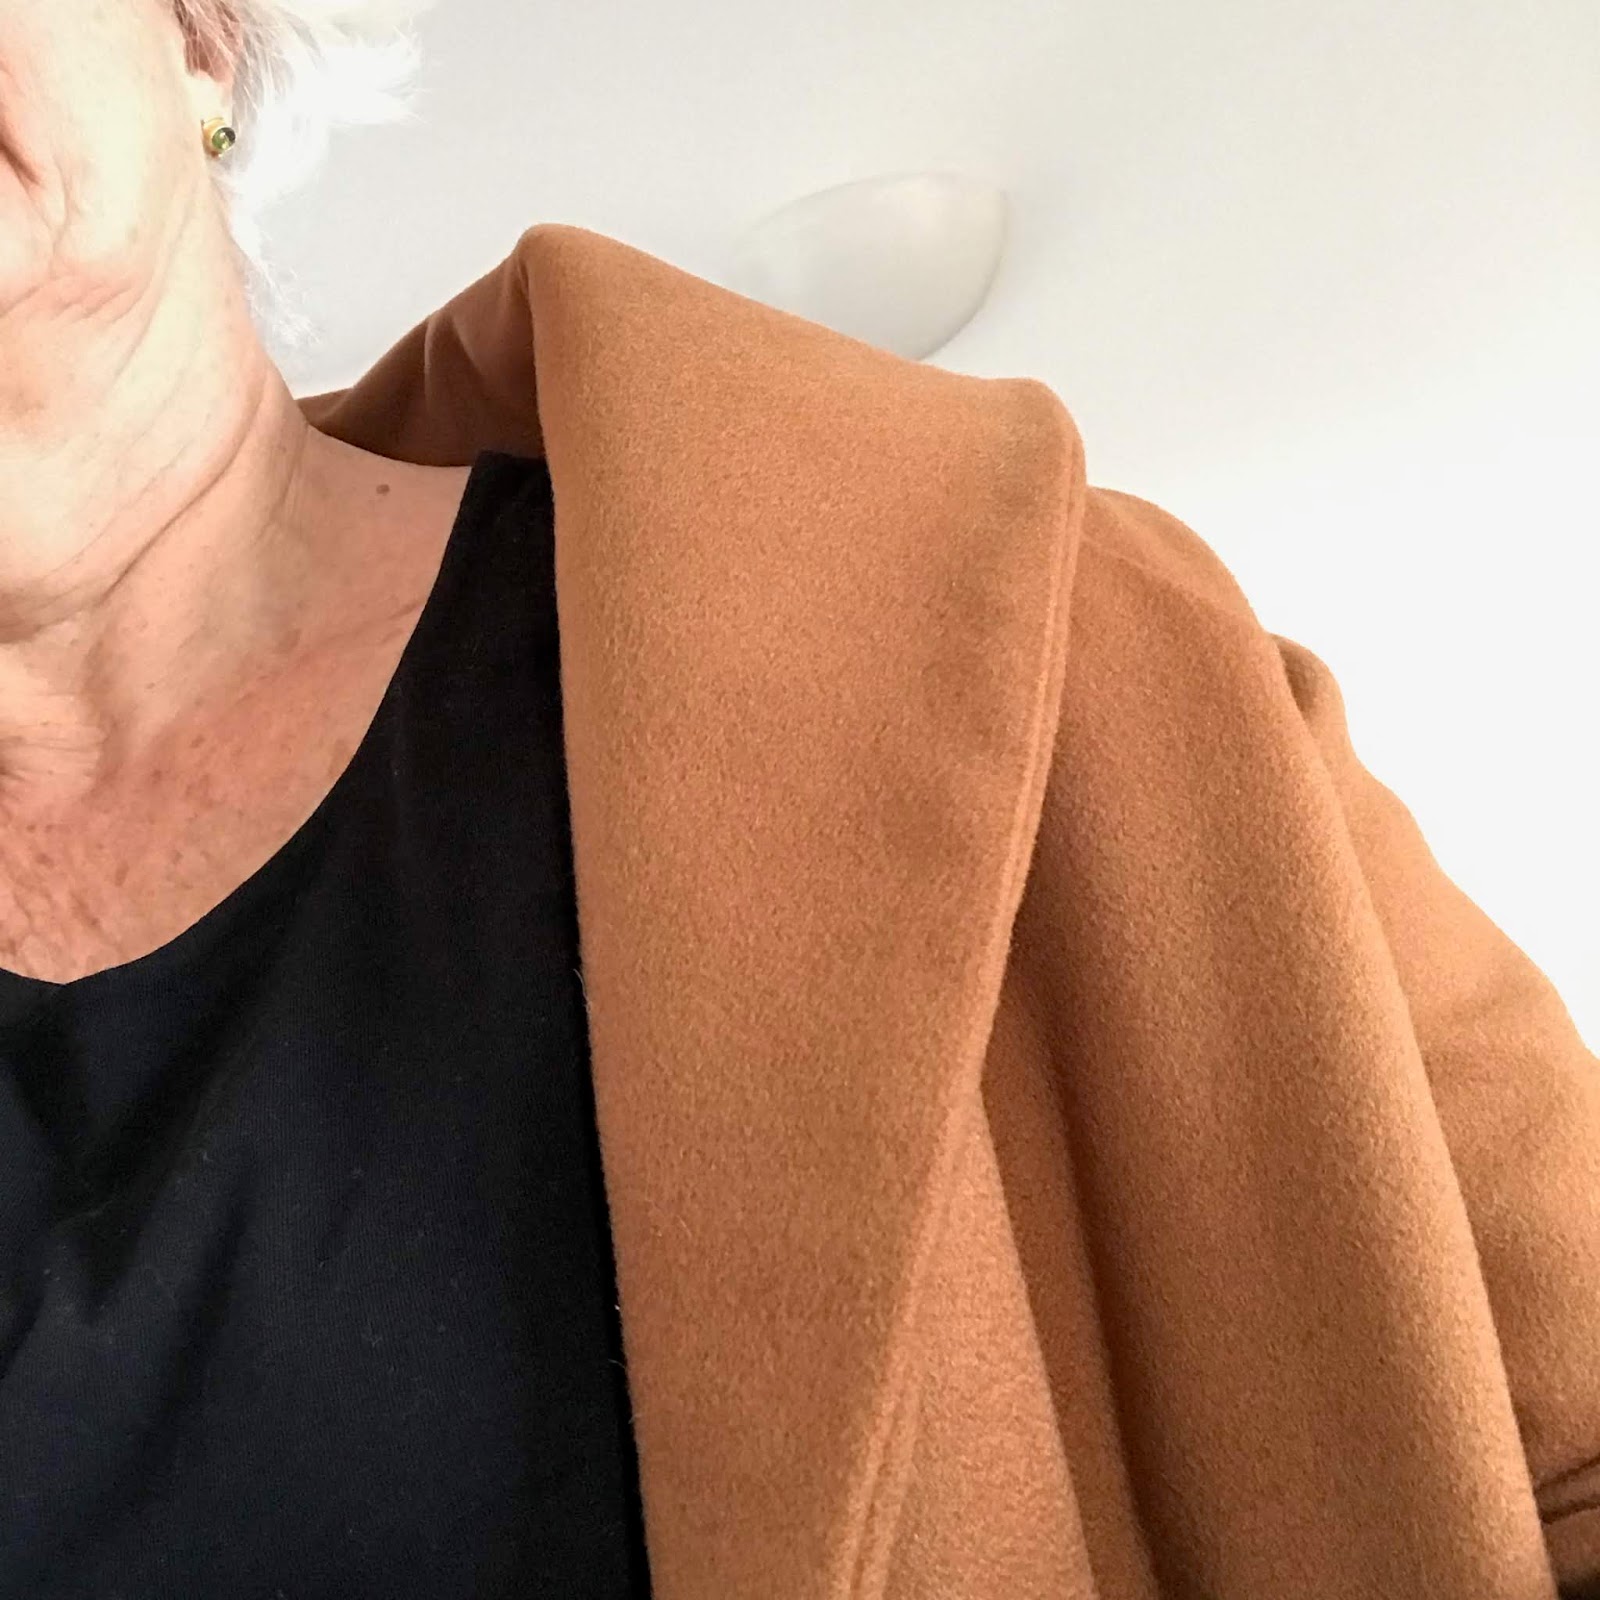
So time for a new winter coat.  Last time I made a coat it was all about a fairly conservative fabric given some special interest with fancy buttons and velvet appliqué  But this time its going to be all about the fabric, something Very Special from a new discovery fabric warehouse, it's 100% Cashmere - how could I resist?

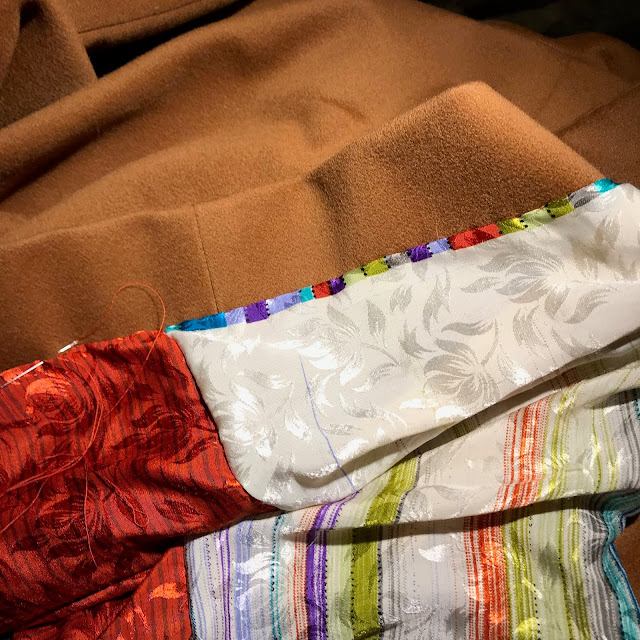
Blue/grey fabric at the top is for a dress (more about this another day), Spice coloured below for the coat - both cashmere

When I say a new discovery I only mean new to me - Crescent Trading is in fact one of the oldest businesses in Spitalfields that is still being run by its founders.  The stock is amazing and I shall just have to leave it to readers to visit for themselves to appreciate the suitings, silks and shirting, not to mention the cashmere.  


The coat design is simple, a slightly tulip shape, with raglan sleeves, and one button.  But the lining is something else. The jacquard silk with a multi coloured stripe is in fact a sarong bought in a harbour-side shop on a greek island on my holiday this year. 

The hope of summers without coats, cut into a coat for winter ahead (words stolen from my friend the writer Elizabeth Speller)


It's the Oslo Coat from Tessuti Fabrics.  The pattern is well drafted, the coat fits well and is true to size.  But (and of course this is not a criticism of the pattern) I will never buy a print at home pattern for a full size garment again! I think in the end it felt as though I had cut out the coat four times before I was done, not to mention the paper and ink for my printer!  The instructions were also a bit wordy and over lengthy for me but an inexperienced sewist may find this more a help than a hindrance.

The simple shape went together in just two days, plus a couple of evenings hand sewing


The button came from Textile Garden, my favourite on line button store (They visit yarn and sewing fairs around the country too)


Always beautifully packaged

I was not entirely sure which of the colours would be best so I bought one of each in silver and bronze


I chose Bronze


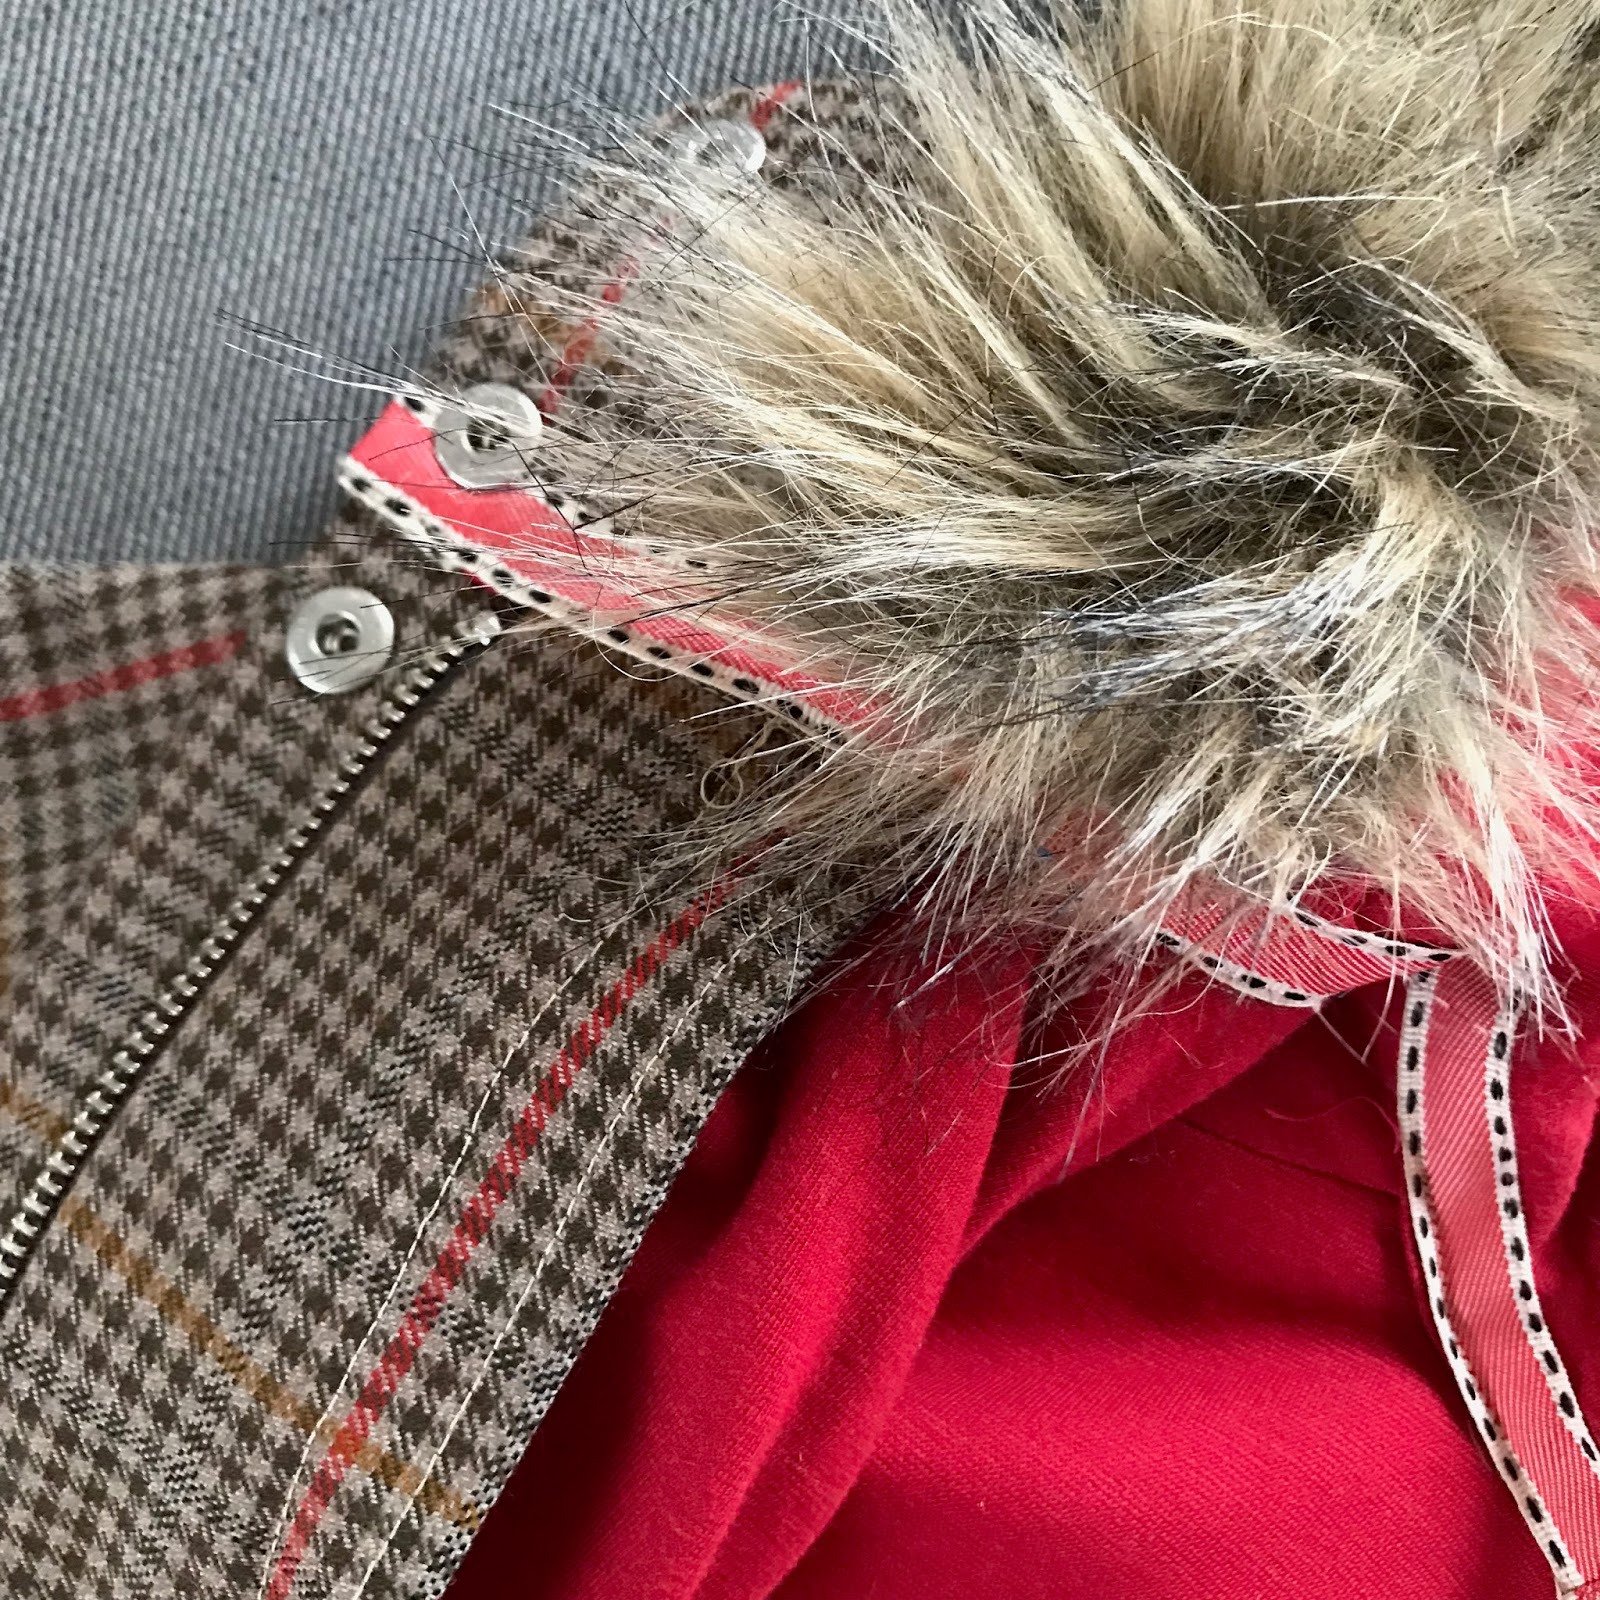
I always agonise a bit between hand sewn, machined, or bound button holes.  I think there are pros and cons with both hand sewn and bound for coats and practically always make machine sewn ones in lighter fabrics.  You could say that, as tailors always sew the buttonholes, that they look more professional, but if skilfully worked either can look smart. (IMHO)  I'm happy with my choice (and at the request of a friend I will post a tutorial on how I work my bound button holes very soon)


With some very careful piecing the sarong yielded just enough fabric to make the entire lining from it (I had thought I would have to raid my stash for some toning fabric to complete the sleeves).


The simple plain lines of the coat hiding the totally bonkers lining makes me smile.


Temperatures are falling and the coat is finished just in time

xx

c


Wednesday 11 April 2018

Shirts


In the same week that a friend's mother was destashing and I scored two lengths of shirting (one poly-cotton and one wool cotton) I saw a progression of photographs on Instagram from a sewist, describing the making of a man's shirt.  
Poly-cotton (l) and Wool/cotton (r)
I could do that, couldn't I? How hard would it be? JTH agreed,  nothing to loose and he would gain a couple of shirts if I was successful!

The instagrammer (Sew-it WithDi)  recommended Vogue V8759

It's quite an old patten, practically vintage

When I read other people's comments on their sewing projects (and if you are interested in joining a group and benefitting from the hive mind I can thoroughly recommend The Self Sewn Wardrobe by Mallory Donohue a great facebook group*) I see that many people begin with a muslin. I have to confess  that in all my years of sewing, and I began aged about 8 sewing doll's clothes on my mother's ancient treadle machine, I have only made a muslin once, for my wedding dress in 1977. I don't even tell myself that I will treat my first attempt at a pattern as my 'wearable muslin', I rarely make up a pattern more than once (with one exception, maybe I'll blog about that one some time) I just plunge in - with some variable results, I have to admit.

So, why break the habit? - no muslin this time, either. No matter that I have never made a shirt before. But honestly it is the tiny techniques that I expected to find tricky - ways of sewing that are peculiar to men's shirts and that transform a shirt from home-made to hand-made. 

But I did measure the pattern pieces carefully against a ready to wear (RTW) shirt that I knew fitted JTH to his satisfaction.

I know I have to cut twice but it is easier to plan the lay-out

And here's another confession - I am not a member of 'Team Trace' either,  once I have decided on a size I cut the pattern out. Generally this is no problem as I am only going to make up the pattern once, am I not?

JTH does not have a lot of patience for trying on, so after checking length and chest measurements against the RTW shirt (collar size did not matter, the shirts will not be worn with ties) I just forged ahead. I did not show him the shirt until it was finished and pressed either. You see I have this idea that JTH has a fear of hand made stuff (or I think he does) that it will look daggy and he will have to wear it just so as not to offend me. I don't think he has ever said this, but I always feel that trying on a half made thing will increase this fear. 

I did, however,  subject him to a running commentary each time I emerged from my studio for meals or sleep.  Just because I loved every bit of the construction.  The pattern instructions, that I followed to the letter, instead of my usual practice of just a quick scan of the pictures, were brilliant.

This is the wool-cotton fabric, you can see how springy it is but it pressed out well

When placing the collar band I found lots of pins placed at right angles to the seam the best way to keep the layers in place. 

I wonder how others like to place their pins? Do you pin parallel to the seam or at right angles? And does anyone dare just sew over the right angled pins? I do at times but have had so many broken needles that I tend to only do this on easy long seams with only two fabric layers, on a seam like this I always remove them as I go. This is why I prefer these glass head pins from Merchant & Mills (never the cheaper plastic headed ones that I have learned to my cost melt under my iron)

button holes next and a tiny pocket detail

Almost finished and ready for machine made button-holes. I love  the wonderful button-hole foot that came with my first electronic sewing machine about 25 years ago. Do you know the one? It has a little jig what you insert your chosen button into; after which all you have to do is set the dial to your chosen button hole-shape, place the first stitch, on the carefully measured and marked dot (the only skill required) and hit the gas.

thread to match the buttons, not the shirts

All machining done I sit down with a pile of buttons, needle, thread, thimble (always a thimble), and a cat (nearly always a cat) to sew on the buttons and snip or tie in all cotton ends.

after pressing

The shirts were all made from stash - not a penny spent except on the pattern. I always have cream and white sewing thread (an all purposed poly cotton thread by Gutermann is the one I prefer, I buy it in the largest reel I can get) and have a very large hoard of buttons.

larger pockets to accommodate a modern smart-phone

I have already said that I found the pattern perfect for a novice shirtmaker like me - or even an expert, except an expert may not need to have recourse to the pattern instructions as often as I did. But if I make more shirts and as I enjoyed the process I may break my usual habit and do so, I will modify the back a little. The pattern is quite old, from a time when men's shirts were very fitted. it has a traditional back yoke but the lower back is in three pieces, with run-and-fell seams, and fits closely to the body.  JTH is slim (annoyingly so, probably lighter than me despite being a couple of inches taller) and the shirts fitted well but another time I will make some modifications.

I will cut the back in one piece allowing for a box pleat and little loop at the centre back. I might also mess around with the collar shape but as JTH only wears a tie for weddings and funerals (and then never with a checked shirt!) he is not particular about collars.  But I am wondering whether I can achieve a small enough button hole on my machine to make button down collars.

maybe I'll play with the collar next time

One change I did make and that was to make a deeper pocket to accommodate a modern smart phone - JTH has had many phone disasters over time - the inevitable phone down the loo scenario, but the funniest was when it fell into a large bucket of wallpaper paste.

I would love to hear in the comments of anyone else's experience with shirt making. And if anyone is thinking of taking the plunge do have a look at Mallory's face book group. Each month she takes a new project with lovely VOLGs about the techniques involved and this month she is talking about button downs!

xx

c


Wednesday 31 January 2018

Kelly in tweed

I have been admiring and pondering the Kelly Anorak pattern for a while.  Admiring the photographs of people's projects on Instagram and pondering fabric choices.  What finally kick started my own project was reading Lauren's blog post here. Its one of a series of posts where she charts her progress with the jacket, using products from her lovely shop Guthrie & Ghani. I also had some special fabric I wanted to use, not typical of the sort of material you might think suitable for a parka jacket but I felt it might just work


The fabric was initially destined to be a sports jacket of the most traditional style for my father, a man of most conservative tastes and fastidious dressing (he wore his third best sports jacket and matching tie to do the gardening), he had always had his suits and jackets made to measure. He would buy suitable fabric on his Scottish holidays and on his return visit his tailor, Mr Tandy in the small market town near where he lived. 

Surely a dying breed of craftsmen I imagined Mr Tandy sitting cross legged on his work bench much in the style of the Tailor of Gloucester (the eponymous character in one of my favourite children's books buy Beatrix Potter). Well of course eventually the inevitable happened and Mr Tandy retired leaving Dad with his latest fabric purchase on his hands.  As you may know if you have been reading this blog for a while my father died a few years ago and while I was clearing out his house I came upon the material for what was to have been his last sports jacket.

At the time I have no idea what the fabric should become, I just entered it into my (not inconsiderable)  stash, and then the Kelly pattern came across my radar .


You can see the wool tweed nestling between the two red lining fabrics, Ponte di Roma jersey (a remnant from the Raystitch sale) and some acetate satin. I also bought a hole punch (not illustrated) and a stud applicator. I read the recommendation for a stud applicator from Lauren's blog and I'm very glad I bought both this and the hole punch before attempting to place the snap fasteners and the eyelets for the waist elastic. I have previously used the little tools that come with the studs - do you know the ones I mean? They require a lot of dexterity, as you grip the studs between the little plastic gizmo you hammer it down on your kitchen chopping board to fix it into place. OK for fine fabrics but I have had so many misplaced studs on thicker stuff. This time all the studs went in exactly where I wanted them to be. 


I can't honestly say that the linings were one of my original modifications as Closet Case Patterns has produced a pdf down-load pattern as an addendum to the original pattern. But I did draft my own using the outer pattern pieces and trimming off some of the seam allowances, the jersey for the body and satin the sleeves.


The fur trim around the hood was my own mod. I had to check out a few ready-mades on-line to get the placement of the fur correct. I don't think the hood up look is great on me but it will be perfect in bad weather.

Incidentally the pure wool. smooth weave of this fabric is as shower proof as any modern high tech fabric (as light too) and it is nearly 100% wind proof.


The ribbon I used to cover the neck seam is also used to create a hanging loop (I know - the correct way to hang your hand mades is by a proper coat hanger but some times you just need to hang your jacket on a hook. )


I had this bright idea that I would knit some cosy cuffs ( I love combining crafts in a project) but in the end I could not work out how to fix them as the jacket sleeve has slits and fastenings - another time I might make the sleeves differently as I don't think they need to open at the cuff


The pattern is quite technical, I learned a few new tricks as I sewed. I had never before inserted a zip using this method with flaps, nor even heard of the system of sewing the yoke called burrito. In fact as a pretty experienced sewist I usually just scan the drawings in the pattern instructions and forge ahead, but his time I read each stage carefully TWICE. Sometimes I had no idea where the instructions were taking me, I just obeyed and sewed 'this' to 'that', folded something in and essentially DID WHAT I WAS TOLD. And it worked!

I can't tell you how pleased I am with my parka - I think I have worn it every day since I made it. I would love to hear in the comments from anyone who has made a Kelly of their own, How did you find the pattern? The fit? (mine is just right, thank you)  and do you love wearing it?


xx

c

never without a little cat involvement


Monday 22 January 2018

Ta Da!

My first FO of 2018.


Actually off the needles a couple of weeks ago. But then there were ends to sew in


And then, when you knit a woolly pair of something for your hands you need to consult the availability of your assistant to take the final photo!


The pattern is Mîlét by Ysolde Teague

xx

c

Saturday 6 January 2018

One down...

As I finished Mitt no 1 it was obvious I would not have enough yarn for a second in the same colour sequence...


But I do love the pattern, in particular the way the colour work pattern comes together at the finger and thumb tips.


So the only solution to the yarn issue is to reverse the colours on the second glove, casting on now...

xx


c

Wednesday 3 January 2018

All good intentions

The virtual knit night began well (for everyone else).  Lots of WhatsApp chat, photos and not a little frogging. We were joined by others, temporary members of the Basingstoke knit and Natter WhatsApp group, including knit-like-you-mean-it (after all what else do you do when you are in Oxford about to defend your PhD thesis the next day but knit?) 

I loved joining in all the chat, seeing all the photos, and commiserating over the ripping out but I still had the first task in Operation-Finish-Up-Stuff-in-2018 to complete.  This task took a lot longer than I anticipated (more about it later in the week) so I did not actually was on till late on New Year's Day. 

But I had already carefully selected pattern and yarn so I was ready to forge ahead... right?


But by midnight I was well underway


And forged on until I had completely finished the stars on the outer cuff (the cuff is double, the inner part ribbed in a single colour.)  Then I had a long look and realised three things


  1. I had begun with the wrong colour!  I should have cast on in white, the yellow is for the star, the inner ribbed cuff and the tips of the thumbs and fingers
  2. Therefore I would not have enough of the yellow

AND

    3. I don't like the yellow now it's knitted up anyway


Nothing else for it but to ribbit - ribbit - ribbit and stash dive


Actually I think I like this green better in any case and by midnight last night I was back on course


xx

c

Monday 1 January 2018

mittens!

New Year - new intentions.  More blogging, and a bit of variety (sewing, reading, events as well as knitting).  But to begin, my first love, knitting, and something that began, as projects so often do, with sharing a new lovely pattern with friends, captioned 'see this, I want to make it, anyone want to join me?'

Consequently, when friends from my knitting group were all in the grip of frantic Christmas present knitting, we decided that after Christmas we would knit mittens.  We made our plans on WhatsApp, where we often continue the knitty chat begun on knit nights.

We would normally have cast on together at knit night but tonight, it's a public holiday and all the places we meet (coffee shops mostly) are closed so we intend to meet virtually on WhatsApp and Ravelry.  I'm also instagramming my progress with the hash tag #newyearmittsalong

Want to join in? You are Very Welcome!

I have chosen to knit Ysolda Teague's Mīlēt in these left over yarns - (Jamieson & Smith 2 ply jumper weight and Triskelion Mona Sport


More posts to come

xx

C