Pages

Tuesday, 17 April 2012

Procrastination

I just cannot bring myself to throw the tulips away

In their almost dead, petal dropping state they are still so beautiful.  Like some fading society beauty photographed by Cecil Beaton.

I am the master of procrastination.  At university, despite being a mature student (a 38yo mother of 4 when I began my first year reading law at Cambridge) I very quickly mastered the art.  I know I should have known better but...

Supervision to go to - hours spent in the law library photocopying the cases and articles I needed to read before the 4pm deadline - reason, 'I could not work in the library needing the comfort of my room, coffee and biscuits before I could concentrate'.  

Essay to write, ditto photocopying and a whole packet of cadbury's boaster choc and hazelnut cookies.  

Exam revision- a master class in procrastination 
1. I needed to give the children some mummy time over the Easter holiday 
2. I could not begin to revise until I felt enough anxiety to give me the necessary drive 
3. I have to have a set of spiral edged notebooks (one for each paper), A5 size, a set of highlighter and half a dozen pencils and a pencil sharpener.  
4. day 1 of actual revision, sharpen all the pencils (and repeat as necessary between bouts of doing the actual revision)

Many years on I am unreformed.  At the beginning of the year I resolved not to have so many knitting and sewing projects on the go.  It seems that whenever a shop gives out one of those handy calico bags for life I find a new knitting project to fill it.  If you look at my ravelry page you might think that too-much-stuff-on-the-go is not one of my vices but you would be wrong.  I just don't get around to posting the WIPs.  My resolution was not to work on only one project at a time but to have less and to finish up everything that had been sat in a bag for more than a year.

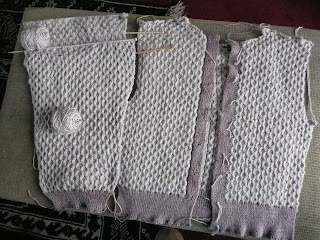
With that in mind I am working very hard on my vintage cardigan.  I am nearly there, 


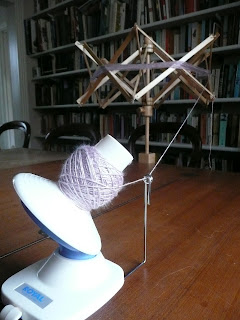
but I have recently experienced a return of the Old Trouble.  I bought a Swift and cannot resist playing with it and winding off the odd skein or two

 And then my attention alighted on this


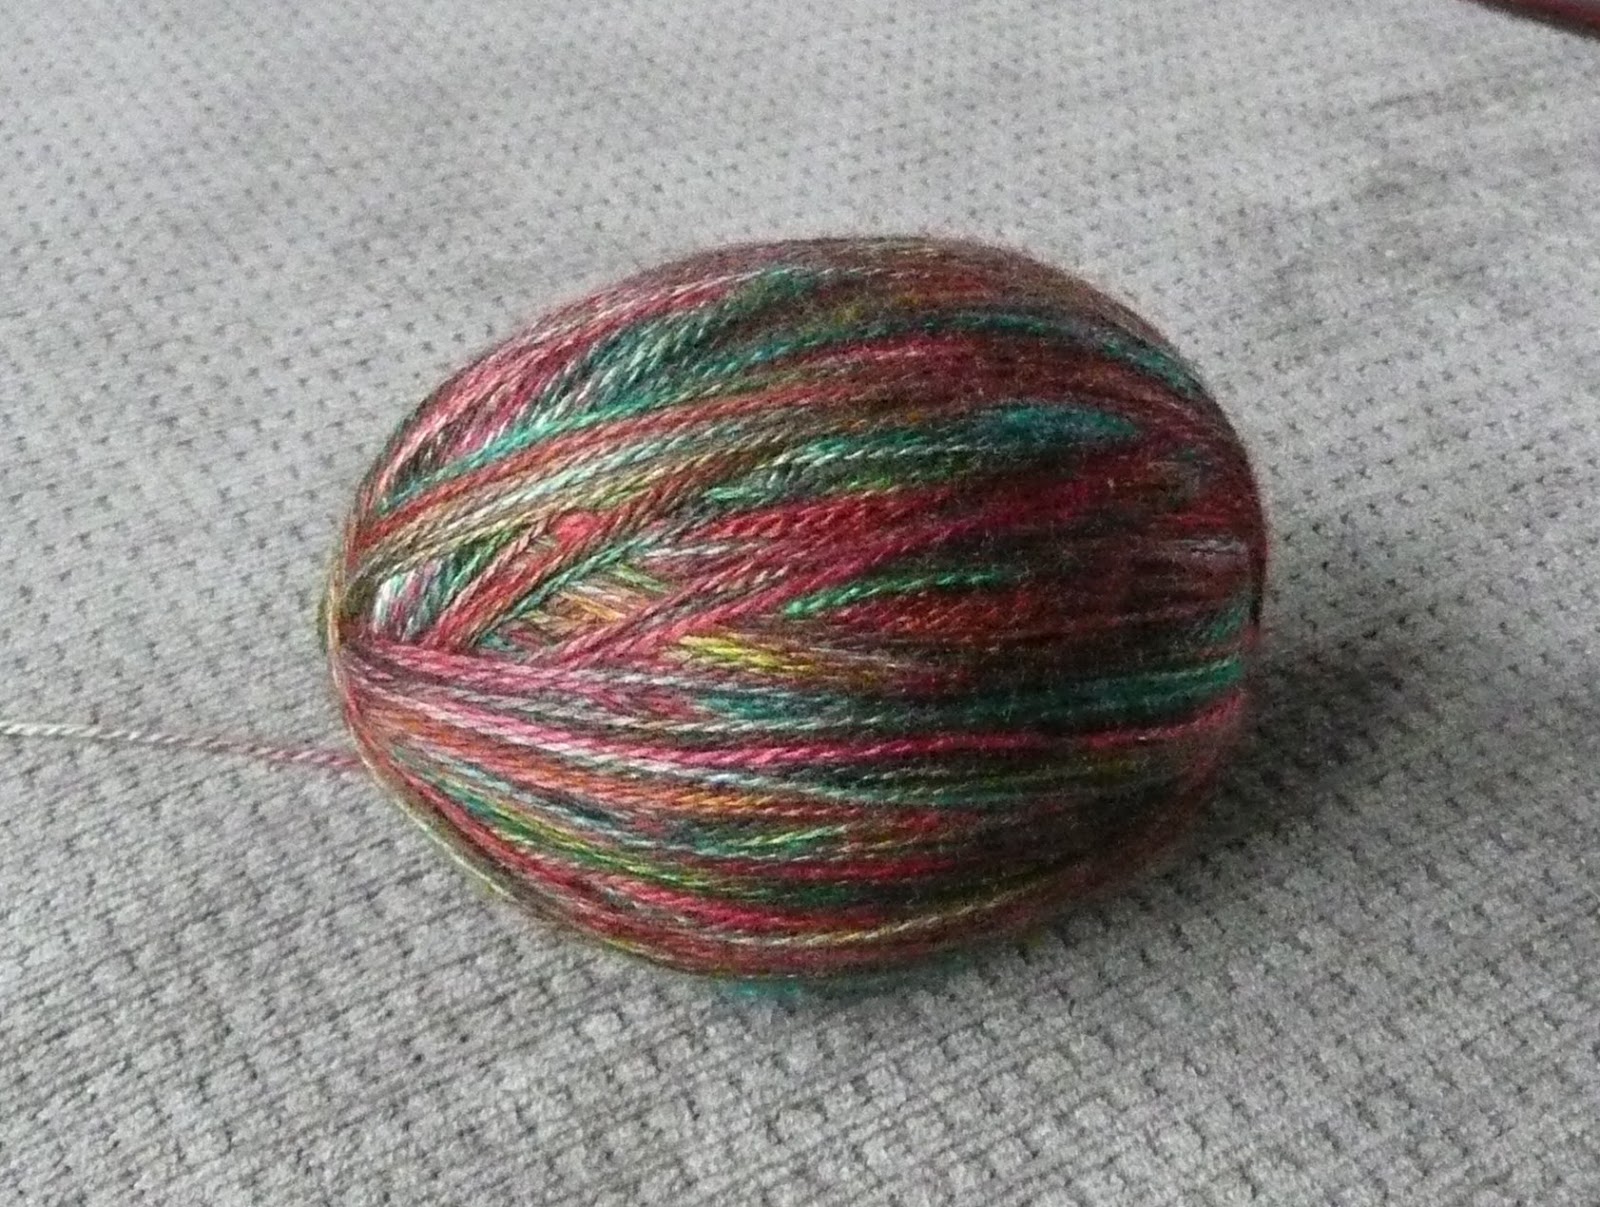
Swiftly Swifted it became this


There are 800 yards of aran weight Araucania, after a search on Ravelry (it is so easy to search under yardage, weight,, style - its Google for knitters) I came up with this which the pattern says can be made in any size from size 8 up to HUGE with 750 - 1,500 yards of aran weight

© Spoked cardigan by Carol Feller
I need to make a medium sized version - very roughly I  would need 1,100 yards for this sweater. I realise I am asking a lot to make a sweater out of my yarn but there is far too much for a cowl and its too chunky for a shawl so I am stamping my feet and shouting I WANT A SWEATER.

So here is a possible solution, I have another 300 yards of a very similar colour in DK weight.  I figure the slight variation in colour will not matter as all the yarn is hand dyed and varies quite considerably (the producer recommends to knit with two balls in alternate rows to blend the colours.  As for weight, I'm thinking I shall knit all the ribbing in the DK, as the main body is knitted side to side and the ribbing added later.  What does anyone think? (and dont worry about telling me to finish the vintage project first - I'm already telling myself that!)

extra DK yarn in the centre

xx

C

PS My old college is Lucy Cavendish its well worth checking out the website,r even if setting off fo university is farthest from your mind at the moment.  I first read about the college in a women's magazine when a nurse on night duty.  I cut out the article and pinned it to my kitchen notice board.  The cutting was old, yellow, and curly before I took it down and seriously considered completing my education.

Tuesday, 10 April 2012

Hats off!


I wear hats, sometimes for fun and sometimes for warmth, I wear them on snowy days, sunny days and wedding days.  But there was a time when women would not go out without a hat, particularly mature women like my grandmother.  I just remember her in the 1950s when she was in her late 60s and, true to her upbringing in the early part of the 20th century she thought it was positively improper for women to be seen outdoors without a hat.  Hats (and gloves) were for correct, respectable dressing, not just for fun and vanity.

So when the latest Titanic challenge came along with the description, Mature Ladies hat it made me smile and remember my grandmother... but it also made me frown.


I earmarked some silk dupion from my stash, bought some tape and some buckram, printed off the instructions and considered using a hand printed silk velvet scarf in some way as a trim.  

But I had never made a hat before and this one came with a set of rather confusing instructions and no pattern.  I decided to wait until others on the vpll1912project had made hats and blogged about them.  I have never joined a group sewing project before but this is the big advantage, everyone sews at their own speed and blogs about their successes and problems they have solved which helps the rest of us.  Before plunging my scissors in I read blogs from Liondefleur and Pam


Two basic shapes - a crown, and sides that slope outwards towards the top and at the bottom a band that folds under and tapers to one's head circumference (the tabbed section with notches cut in it).  Essentially one has a stylised toque that stands a little bit away from the head.


To get the crown right I needed a little height.  Steaming the oval of buckram over a saucepan and moulding it on a pudding bowl gave me roughly the right shape


Before fixing the crown to the sides I cut an oval of silk about twice the size of the buckram crown and loosely pleated it over the dome, fixing with small stab-stitches where I wanted the folds to go (I was aiming for a walnut whip sort of arrangement).

Before attaching the silk to the sides I cut a piece of tape to fit my head circumference, folded under all the tabs at the bottom edge (you can see how I cut the tabs on the picture above) and fitted them to the tape. Then I tacked the whole piece into a ring shape by creating a back seam.  

Thus I now had  the hat in two pieces, a crown covered with silk, and the as yet undraped sides sloping outwards towards the top and folded under at the bottom edge.  Inside it funnelled into a diameter to fit my head.

The silk for the rest of the cover was cut twice as deep as the buckram.  Now I know the hat in the sketch looks a little as though it is based on a wonky concertina but I wanted rather more fluid folds.  First I tacked four equal sized pleats at the front, back and the middle of the sides only, still leaving plenty hanging down to turn under as a lining.  Once I had pulled up the pleats I messsed them up a bit and tacked them in place just as it took my fancy - like this...


I then pushed all the spare fabric hanging at the lower edge up inside the hat to form the lining fixing a small crown of silk at the top of the inside to cover over all raw edges.  I reckoned that the extra folds of silk would pad out the inside of the hat and help it to fit snugly.  I made the whole hat by hand, no machine stitching.  There were no time consuming lengthy seams but the main reason was it is easier to tweak the shape as you go to get the drape of the fabric just right.

I mentioned at the beginning that I was going to try and use a velvet scarf as a trim.  But this scarf is made by my very clever cousin Sharon Verry  (she works as part of an artists cooperative in Cornwall called the Guild of Ten ) and I had no intention of destroying it, I needed to find a way to use it in a whole piece.


In the end I didn't, the scarf, it was too bulky, a small scrap of the fabric highlighting one or two of the folds would have been fab but I don't have any small scraps!  So I contented myself with a small corsage of feathers instead.  The hat is quite comfortable, I think to feel totally secure I would need to employ a hat pin or two but other wise I feel rather glamorous in it


xx

c

VPLL Checklist

  1. Pattern Name Spring Hat for Mature Woman
  2. Sewer’s Skill Level: Advance
  3. Pattern Rating:  I LOVED IT! there was no pattern, I was helped by others who had experimented with the shape and blogged their measurements   
  4. What skill level would someone need to sew this pattern? Intermediate.  The sewing is not really difficult (I did all mine by hand to help create the shape as I sewed) But you need a bit of courage to follow your instinct
  5. Were the instructions easy to follow? The instructions were fairly short, I had to use my own experience, improvise and see what others made of it to pull the whole thing together.  The illustrations were the most help
  6. How was the fit/sizing?  The construction allowed me to get the fit just right (see my comment about using tape above)
  7. Did you make any pattern alterations? There wasn't a pattern exactly but I did make the front lower as other bloggers had advised
  8. Other notes:  It's so glamorous!


PS I am making progress with the tunic  I may have mentioned my big failing as far as knitting is concerned - I have the bad habit of not knitting test pieces.  However, in this case there are several reasons why I simply  must play around with yarn and stitches.  I have no pattern, no idea what some of the colours will look like once knitted up and am not even quite sure what some of the stitches are.  So what I knitted was more in the way of a random sampler than a tension square.


BUT I know what I am going to do now.  I have gauge, colours (I am going for the colour way at the top of the piece) and I have some idea how I will combine crochet with knitting to get the right effect.  I still have to figure out the tassels but I can leave that till most of the tunic is done.


Monday, 2 April 2012

Poiret style

If you are a regular reader of my blog you might have wondered how long it would be before I made a link between the titanic project and knitting.  Well, trawling through my books on vintage knitting I struck gold, a tunic in the style of one of the most favoured designers of the early 20th century Poiret


It's a perfect shape to go with my scallop edge skirt and something I imagine also becoming a favourite item in my 21st century wardrobe.  Perfect too that it is attributed to Poiret (or at least in the style of) as he was at the height of his powers in 1912, having left the couture house of Worth to establish his own house in 1903.

There's no actual pattern for the tunic in the book but I'm going to try and work it out.  It's knitted in a type of rib (row 1: K row 2: P7 K1 rep to the end) the horizontal coloured panels are knitted as you go, the verticals knitted separately and stitched in place (although I might experiment with intarsia here.  There is a row of double crochet eyelets encircling the waist and providing decorative detail near the shoulder.  The cord has crochet bobble and tassel ends and there are bobble fixings closing the  side vents.  A close look at the photographs reveals a yarn with a soft sheen, silk or cotton perhaps.

I don't know whether in 1912 cotton for knitting could be produced with the lovely lustre that we can get today so I guess that it was made in silk.  But in my stash I have some lovely 4 ply Rowan 100% cotton in brown and olive green


So I'll use this.  I also have some other cotton in various colours


After trying every colour combination I decided to use sky blue and mint green.


So it's off to do some serious swatching before embarkation on the main project - watch this space


xx

C

Tuesday, 27 March 2012

Lawful knitting

If I look up from my knitting on my daily commute, this is all I see, so generally I don't, I knit.


I am knitting a pair of black socks, using a technique known to the sock knitting sorority as TUTAAT  (toe up two at a time).  Anyone who keeps a crafting project specially for travelling knows the value of a compact kit. TUTAATs are just that, two circular needles, some stitches permanently on the needles (so no dropping and foraging under train seats) and one ball of yarn (if you knit from the outside and the inside of the ball).  Although it can all get a bit messy at times


Most people who read this blog or follow me on twitter know quite a lot about my knitting life but it seems that fewer people know that I live a double life.  When last week I tweeted 

Time put nose to the PC. Working at home interrupted by 2 meetings at the Law Society in PM Must avoid dreaming of new  project 

Tanya, who tweets as @strikk and has a blog of the same name which I follow as she does mine, tweeted back

How is it that I've only just realised you also a lawyer-ly type who knits.....!  

This set me wondering how many knitting lawyers are out there (I know of at least one other)

I still spend a fair amount of my working life stalking the corridors of power in my dark Lawyers suit, much of it is fascinating

I took this photograph of the lobby to the House of Commons while no one was looking (I hope I don't get sent to the Tower for this!)


Even the escalators at Westminster tube station exude a rather exciting sense of power


But it can all become routine and at times my mind wanders to thinking about the work I shall do on the train home and my amusement at the looks on the faces of my fellow passengers as I pull out of my briefcase, not a sheaf of papers, but my knitting

Black socks might be quite suitable for work wear on a chilly day but I shall knit a fairisle border along the top. I'm thinking of crossed knitting needles and a ball of yarn


x

c


Monday, 19 March 2012

The third post

Not my third blog post ever but Titanic #3  A ladies skirt from February 4, 1912 (VPLL 0200)  I received the pattern as the largest size pdf and took it to my local print shop as before.

In size 34" waist it looked as though it was going to fit me without alterations (and without contemporary underpinnings being absolutely essential).  When I made the Princess Slip I had to compromise on trimmings and use lace made from synthetic fibre, but for this project I do want to use materials that are as close to the contemporary fabrics and notions as possible.  My local fabric shop was able to provide linen in gooseberry green, cotton binding in french navy and cotton tailor's canvas.   Nothing synthetic in sight (except possibly the sewing thread)


The hooks and eyes and press studs (snaps?) are metal so could have been made in 1912 but I will defer to friends who have a much better knowledge of what-was-used-when to correct me if necessary. I cut the facing for the scallop edge as a straight piece to begin with and cut it to shape, after sewing.


Linen and cotton may crease with wearing (I don't mind a few creases, though some do) but it is also a dream to sew with, as when pressed it is possible to get a near perfect alignment.


I chose to use the contrast binding to trim the top of the waist (which is interlined with the canvas) as well as the scallop edge.


In the picture at the top of the blog you can see that I have 9 vintage style buttons laid out with my kit but I soon realised I had miscounted and needed 13.  I could have redrawn the pattern to create fewer, bigger, scallops but instead decided to use scraps of the cotton binding to make covered buttons.  A button making evening followed...


The finished effect pleases me enormously, although I admit to the edge being more saw-toothed than scalloped!


The front opening is closed with hooks and eyes.  When I tried it on the points gaped a little so I fixed the points of the opening with tiny  press studs  and lower down small tacking stitches. Being used to 5/8 inch seam turnings on modern patterns the 3/8 on these was a bit of a challenge, but it does work, even when neatening seams by turning under the seam allowance and stitching on the edge. The waist facing is blind hemmed along the natural waist line.


Now I do intend to make a corset from Corsets by Jill Salen (purely for the purposes of the clothes hanging correctly, of course!)   But even without tight lacing the skirt fitted quite well.  Authentically in fact, as after half an hour walking about my bedroom trying to get the right shot, I felt mildly breathless from the tight fit around my lower rib cage.


The blouse is modern (Anthropoligie) but I felt it had the right shape, pin tucks at the shoulders and softly draping sleeves.  

Some bloggers have provided details of how long a pattern has taken to make up.  I have again failed to time myself but estimate it took about 5 hours to cut out and machine sew (the pattern pieces fitted together effortlessly without any adjustments) and probably as long again on the hand sewing.  But I didn't rush it and I had fun!


xx

c

VPLL Checklist

  1. Pattern Name Scallop edge skirt  #0200
  2. Sewer’s Skill Level: Advance
  3. Pattern Rating:  I LOVED IT! the fit is really good (so glad some of those women in 1912 had a 34" waist!)   
  4. What skill level would someone need to sew this pattern? beginners with a little help I would say.  You need to do a bit of simple hand stitching and care to get the binding right but all the other shaping is in the seams
  5. Were the instructions easy to follow? Yes.  My only question was which way should the scallops face.  My instinct was that the opening should face the back but the pattern and instructions said otherwise so I followed that and put snaps on the points of the scallops at the opening and tacking stitches further down to avoid any gaping
  6. How was the fit/sizing?  yes exactly
  7. Did you make any pattern alterations? no
  8. Other notes:  The style would be great for contemporary wear too


Tuesday, 13 March 2012

When is a knit-along not a knit-along?

Answer:- when a novice tries to start one.  I'm afraid its all gone wrong already.  I think it should begin with a group of friends who decide to make something, buy the yarn at the same time, cast on in unison and keep pace as they reach the triumphal finishing line in a dead heat. And that is what is called a knit-along, a KAL in knit-speak (It was a while before I cottoned on to that one)

It began well when  Kathleen whom I met at P3 2011 posted a picture of this missoni-look-alike cowl on twitter

Liquid Amber (it's a free Ravelry download)
there followed a certain amount of tweeted oohs and aahs from the knitterati.  I tweeted that the pattern would be perfect for one of my unravel purchases and  Kathleen suggested a KAL.  She and I did agree we would link blog posts.  But that is when I let knitting temptation lead me astray and went off on what legally speaking is sometimes called 'a frolic of my own'  (once said by a high court judge, honest)


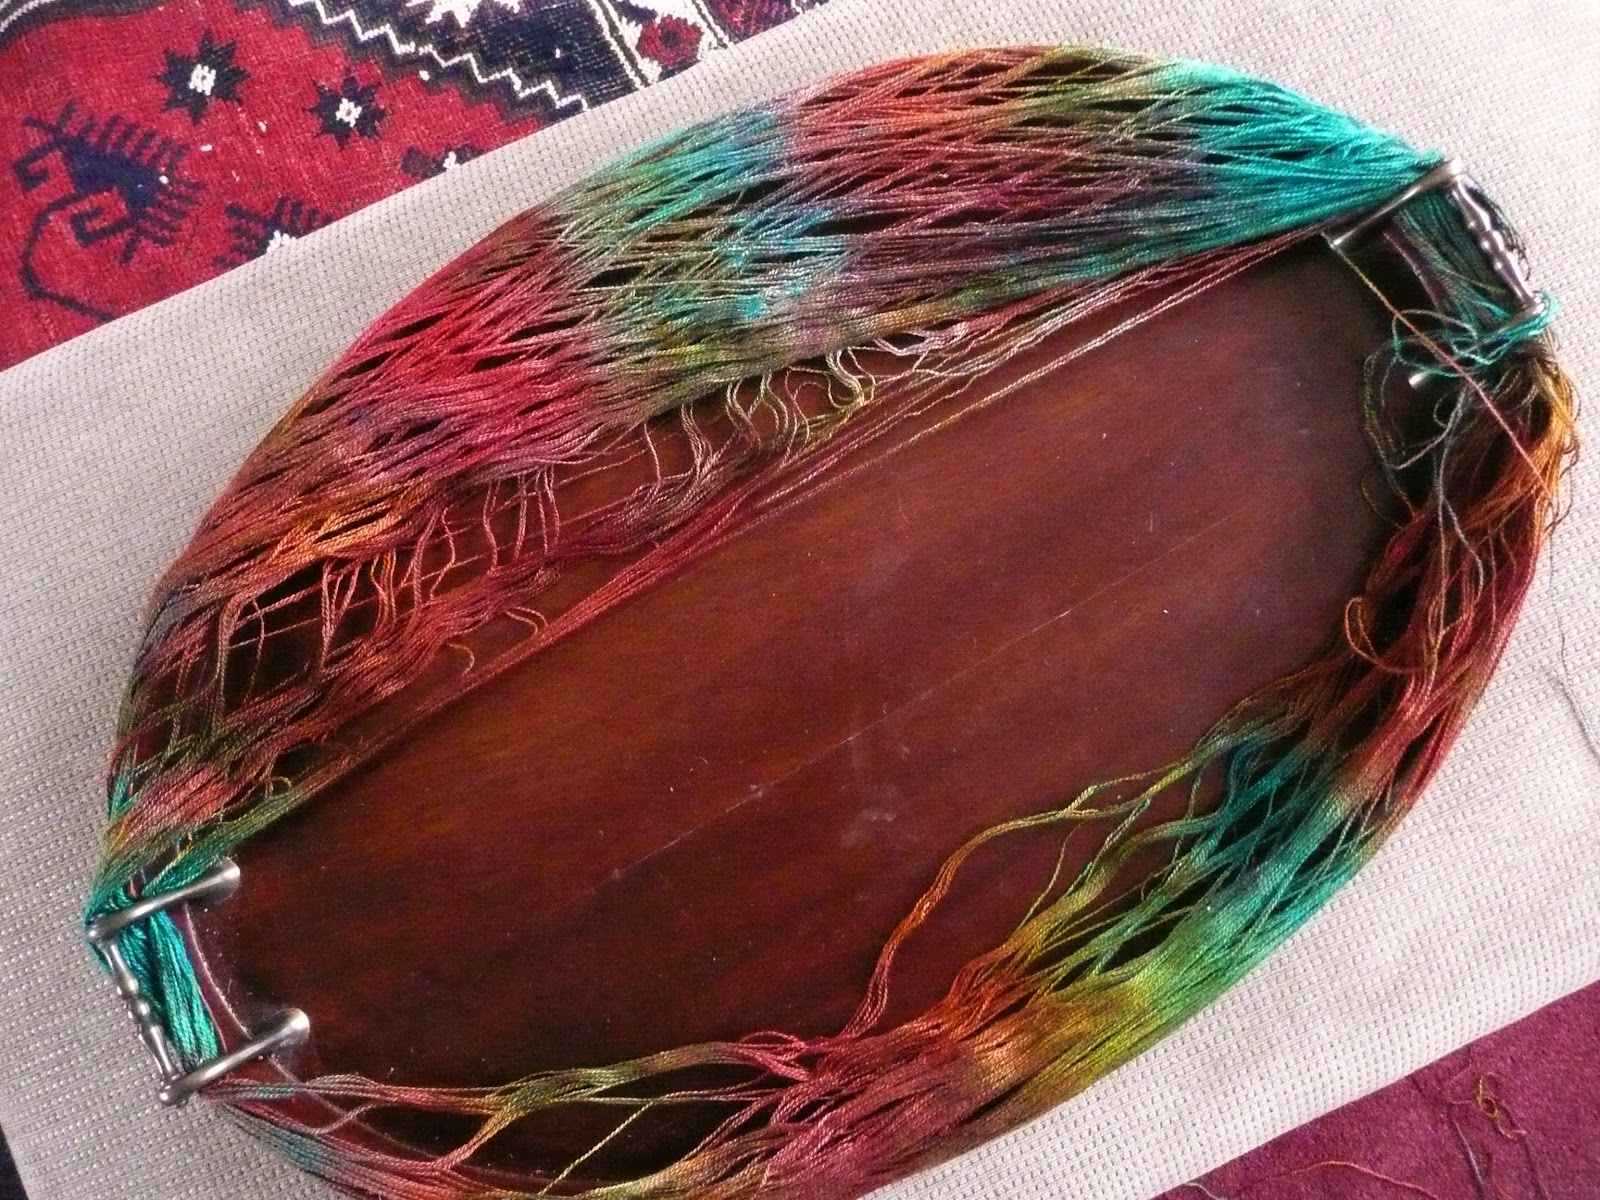
This is the yarn, beautiful fine sheeny 50/50 silk/merino hand dyed by the Skein Queen.  First problem, JTH was out and I wanted to begin AT ONCE (there's no satisfaction in delayed gratification knitwise).  I need a swift and yarn winder so much, but this day I looked around the house and my eyes alighted on this old tray


It might look a bit messy but the handles work perfectly well to keep the hank falling off.

wound and ready to...


cast on


It hasn't turned out as stripey as the original.  A more experienced knitter could have told me that from just looking at the skein, but I love the colours and I can always knit another, asking next time for yarn with long colour repeats.  .  The lace stitch is very easy to learn.  There is a chart and text instructions in the pattern. I added two more repeats (30 more stitches) to make my cowl a little longer. I found I could knit up one complete pattern per night so it's...


I realise that I should have waited, it is not a KAL, but more like a race and that is not polite.  But Kathleen is a very busy woman.  She is not only a PhD student she is also making more that a stripey cowl at the moment (see her blog for more detail!)  I think she has the yarn picked out, however, so keep an eye on her blog.

I have more on the Titanic project to blog next week but if all goes to plan there will be a big PS with a picture of the finished cowl as well

xx


PS
All done now

Lessons learned 

  • use yarn with long repeats if you want the stripey look
  • check the size as well as the tension.  I knew I wanted my cowl to be a little longer to drape more, so I added 2 more repeats.  But I should have measured.  After blocking it turns out 4 cm greater in circumference than the pattern - as expected - but that is still not long enough to get the look I like.  I have plenty of yarn left so no excuse!
  • photograph cowls in full light with a white background if you don't want your neck to feature (success there)


I still like it and it will make a pretty collar to a plain dress but if I make another I shall make it longer, probably  in 4 ply and get the colours right!


Tuesday, 6 March 2012

Sleeping in your sock(s)

Very soon after he was born it became apparent that The Boy loved being cuddled.  His favourite sleeping position is being cradled in someone's arms.  He would sleep for England if only there were enough people around who did not need their arms for anything else for a while.  He often has to settle for second best if his mother is busy and be carried around in the baby sling.  Third best is being wrapped up very snugly.


So when I saw a pattern for the owlie sleep sack and hat by Theresa Cole on Ravelry it seemed absolutely perfect for him. I made it in my favourite Debbie Bliss Cashmerino (aran weight this time).  It knitted up very quickly, although after making it exactly the right length according to the pattern I had to unpick it and knit several more inches - The Boy is very long.


The owls are formed by little cables placed one above the other.


I have seen these owls decorating mittens and a child's jumper where tiny pearl buttons are used for the eyes but  buttons could be dangerous for small babies so I left them out as the pattern suggested.

I think it can be declared a success


The pattern name is sleep sack but The little Model calls it a sleep sock... so sock it is


x
C